Review of EXP-312 and OSMR

Introduction
In 2021, OffSec (previously known as Offensive Security) introduced their first macOS-related security course with the name "Advanced macOS Control Bypasses" (EXP-312). This course discusses logical attacks that can be performed on macOS to escalate privileges and to bypass the system's security controls. As usually expected from OffSec, the course is well-taught and goes a bit deeper into trying to explain why something is the way it is. Although it's not a penetration testing course, it can be a good start to get an overview of macOS from a security perspective. This a rolling course, so you can expect it to be up-to-date as long as you have an active subscription.
Background
Personally, I had no interaction with macOS prior to this course. I thought I'd take it just to expose myself a bit to macOS and its internals. Also, having seen some of our clients at work use macOS, I decided to enroll into the course to see what it can offer.
The Course
I enrolled in the course back in March 2022, but due to the busy schedule I had last year, I wasn't able to dedicate the time that year to study the course. Since I subscribed to a Learn One plan, earlier this year, I realized that my plan was going to reach to an end in just three months.
My goal was to finish both this course as well as OffSec's Foundational Wireless Network Attacks (PEN-201) course that is given for free as a part of the Learn One plan.
The course can be purchased through the plans shown in the following figure:
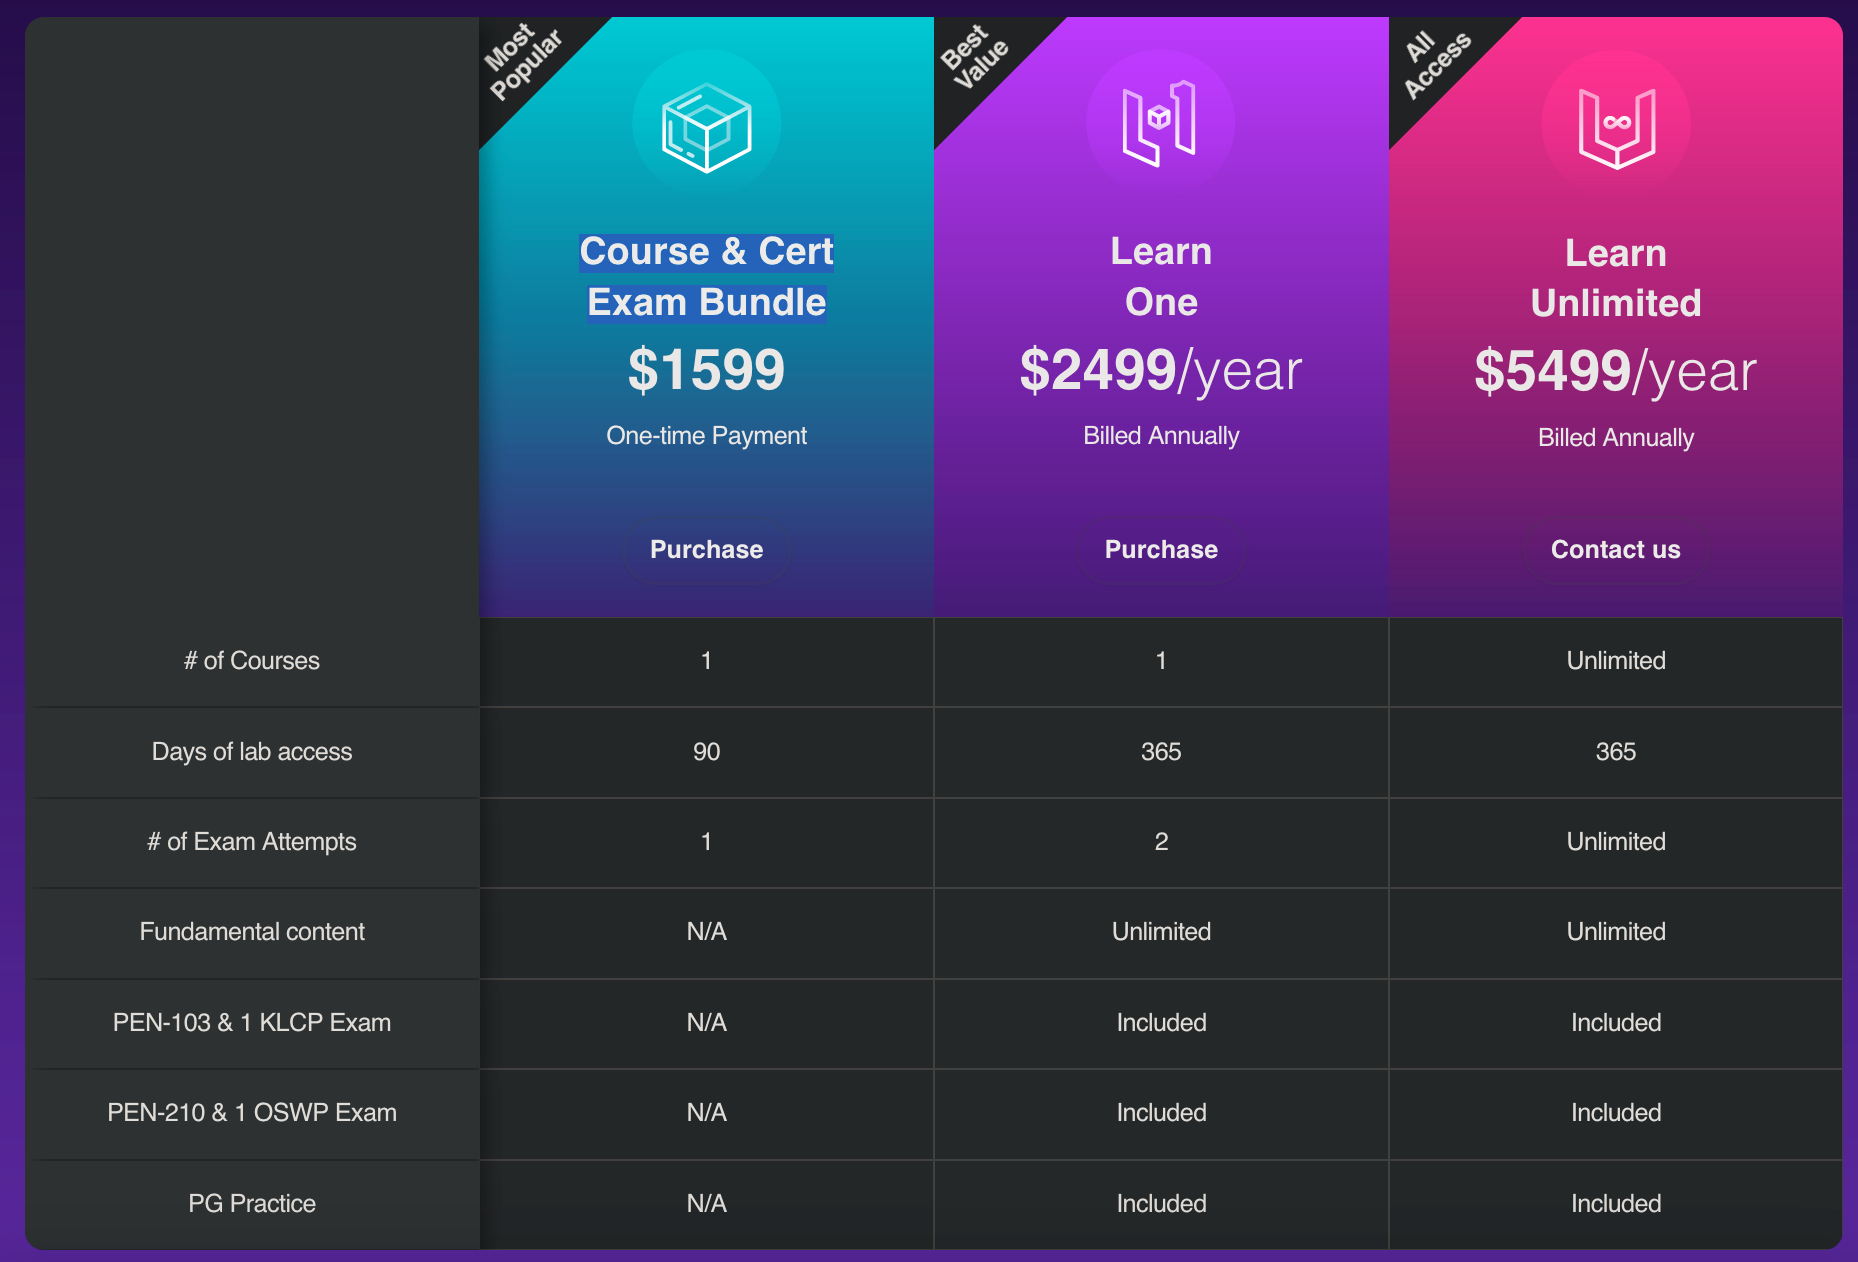
Back when I enrolled in the course, the Course & Cert Exam Bundle wasn't available as it was only introduced recently, so I had to purchase the course through the Learn One plan.
For this course, you do not need to have a computer that runs macOS, but I personally recommend having one in case you can. I purchased a little MacBook Air that runs on an Intel CPU as the course materials are all taught in x86-64 architecture, so you won't be reverse engineering ARM applications during the course. That said, there's been a new update recently that introduced shellcoding in Apple silicon devices, so you might want to consider getting one with Apple chip and using the lab machines for the majority of the course where x86-64 machine is required.
The course contains the following modules:
- macOS Control Bypasses: General Course Information
- Introduction to macOS
- macOS Binary Analysis Tools
- The Art of Crafting Shellcodes
- Dylib Injection
- The Mach Microkernel
- Function Hooking on macOS
- XPC Attacks
- The macOS Sandbox
- Bypassing Transparency, Consent, and Control (Privacy)
- Symlink and Hardlink Attacks
- Getting Kernel Code Execution
- Injecting Code into Electron Applications
- Mount(ain) of Bugs
- macOS Penetration Testing
You can find the full list of modules and topics in the course syllabus.
The course starts with the basics of macOS and objective C. It then discusses some of the tools that you'll utilize during the course. Starting from module 4, the course delves into discussing macOS exploit development and attacks.
The course effectively teaches you most of the basics you'll need throughout the course, so the only things you'll need to know before getting into the course in my opinion are the following:
- Basics of x86-64 assembly.
- Basics of the C programming language.
- Basic familiarity with debuggers and exploit development.
Although most of the case studies were discussed on earlier versions of macOS (Catalina, and Big Sur), the basic concept is still applicable in most cases.
One extra tip I have to get maximum benefits of the course is to have an up-to-date macOS and follow the course through both machines: the one in the lab and your up-to-date macOS. Of course, you'll notice differences, but you'll learn a lot of things including things that have changed between versions. This will require extra time and efforts, but it will be worth it especially if you're planning to make macOS security research your main focus.
The course is awesome for those looking to get into macOS security, but one thing I didn't like about the course was the connection latency of the labs.
Many (if not all) enrolled students have had issues with the labs connectivity, and that was one of the reasons that I decided to purchase a MacBook Air for this course. You're supposed to connect to the lab machines through SSH and VNC (for accessing the UI). However, VNC was very sluggish and unusable, and you cannot really say "I'll do everything through SSH 😎" as you'll find out why yourself once you enroll in the course :)
For the labs to be usable, I used NoMachine which has a specific protocol that seemed to be more efficient in the labs.
For installing NoMachine in the labs, I used the following script to copy and install it when needed
#!/bin/sh

# To install sshpass in macOS, use the following:
#    brew install hudochenkov/sshpass/sshpass

# Download NoMachine from:
#  * https://download.nomachine.com/download/8.4/MacOSX/nomachine_8.4.2_5.dmg
NM="./nomachine_8.4.2_5.dmg"

IP=$1

if [ -z "$IP" ];
then
  echo "Usage: $0 <IP>"
  exit 1
fi

echo "Copying $NM..."
sshpass -p offsec rsync -avP -e "ssh -o UserKnownHostsFile=/dev/null -o StrictHostKeyChecking=no" $NM offsec@$IP:~/nm.dmg

echo "Installing $NM..."
sshpass -p offsec ssh -o UserKnownHostsFile=/dev/null -o StrictHostKeyChecking=no offsec@$IP <<EOF
hdiutil attach nm.dmg
echo offsec | sudo -S installer -pkg /Volumes/NoMachine/NoMachine.pkg -target / 2> >(grep -v '^Password:' -)
EOF
The original script is obtained from this Discord message, but I modified it a bit to use rsync instead to get status about the copy operation as it can take some time, and it's always nice to know how much time is remaining :)
You can just run the script as follows to install NoMachine on the lab host:
$ bash install_nomachine.sh 192.168.8.100
Copying ./nomachine_8.4.2_5.dmg...
...
Installing ./nomachine_8.4.2_5.dmg...
...
installer: Package name is NoMachine
installer: Installing at base path /
installer: The install was successful.
Next, you'll need to give NoMachine access to the desktop. You'll need to go to the System Preferences > Security & Privacy. Through the Privacy tab, you should enable all the necessary requirements.
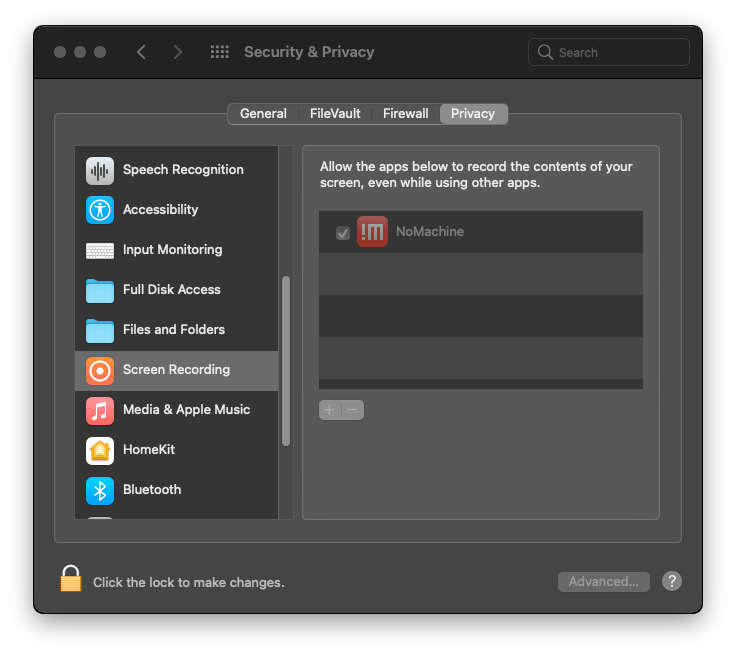
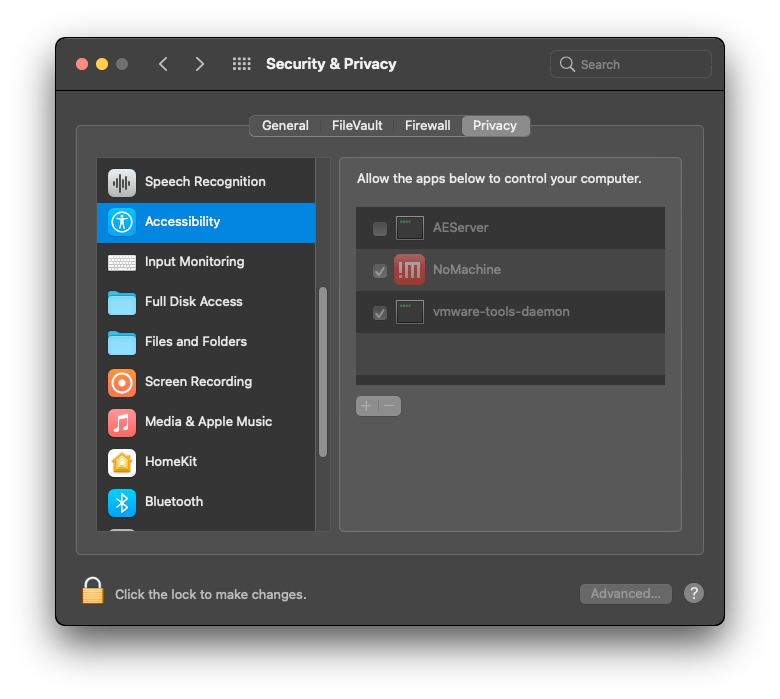
Once you do that, you should be able to connect to the lab machines through NoMachine client app. You'll notice a huge improvement in terms of usability of the lab machines when using NoMachine instead of the preconfigured VNC.
That was the only downside of the course, but personally, I used my MacBook Air and configured macOS VMs, so I was able to work on the course locally most of the time.
As of this writing, the course has been updated along with the labs, but the update has not been reflected in the course syllabus available through the previously listed link.
The update included more information about the latest version of macOS (Ventura), added a couple of new case studies, and also moved few topics around between chapters. The update also included a new set of lab machines: Monterey and Ventura. More information about this update can be found in this Discord message.
As of April 26th 2023, there's been also another update that introduced a new module about shellcoding in Apple silicon devices, but you'll need to have your own Apple silicon device (i.e., a Mac device with M1 or M2 chip) to practice. More information about this update can be found in this Discord message.
The Exam
The exam consists of 4 hands-on practical tasks that you have to solve in 47 hours and 45 minutes, and then you have another 24 hours to submit your report. As with other OffSec exams, you connect to a VPN that contains the exam labs with all the necessary information and description of the tasks to solve them. I used NoMachine during the exam as VNC was very laggy.
To be honest, I didn't particularly "like" the exam. I only liked one of the tasks, but the rest of the tasks were more like just fillers in my opinion. I can't elaborate more on this without spoiling the exam, but the exam guide contains some information on what you can expect on it.
I thought that the exam was not hard. In fact, it was relatively easy. It took me around 10 hours to solve everything.
As of this writing, the exam has not changed since the initial release of the course, so some modules have not been yet included in the exam. There's a potential update coming to the exam soon, but there's no specific date as of the moment on when it's going to be updated.
As for the exam report, I usually write my reports in Markdown. For OSMR exam, I used this tool that I specifically made for this exam. A sample of the generated report can be found here. The entire setup process can be found in the Github repo.
Common Questions
1. What do I need to know to enroll in the course?
As I mentioned earlier, you need to have a basic background in the following areas:
- x86-64 assembly.
- C programming language.
- Familiarity with debuggers and exploit development.
2. When am I ready for the exam?
You solved all the exercises and extra miles? If yes, then go for it!
3. Will this course help me in iOS exploit development?
This course's main focus is macOS, but there are certainly some common aspects between the two systems. That said, I don't think this course will necessarily help you start iOS exploit development, but it may help you find the direction.
4. How much time does it take to get the exam results?
It can take up to 10 business days, but it usually takes less than that. Mine took around 4 days to get the results after submitting the report.
5. Where can I get more information or ask a question about the course?
Here are helpful links:
- EXP-312: Advanced macOS Control Bypasses | OffSec
- EXP-312: Advanced macOS Control Bypasses OSMR Exam Guide
- OSMR Exam FAQ - Offensive Security Support Portal
- If none of that answers your question, then I've got you the best place to ask your question in: OffSec's official Discord server. You'll find a specific channel there for EXP-312. It's called exp-312-general. You can ask your question there, and somebody will hopefully answer your question.
Final Words
The course is among the best (if not the best) when it comes to macOS security. If you're a penetration tester, a security researcher, or even a macOS application developer seeking to broaden your understanding of macOS security, then I think that this is the right course for you.